


The days of providing clients with static Photoshop designs in the web business are long gone. However, we still use Photoshop in-house to help us visualise a design before moving to into browser. For quite some time we’ve been hearing good things about Sketch for mac, but with constant deadlines looming, who really has time to learn a brand new programme? – A case of, better the devil you know. Whilst we perfected our SVG animations and clean code we realised that a major sticking point in our work flow was the production of our static design concepts, especially when a design had numerous pages and versions. Biting the bullet, we downloaded the Sketch Trial. Two months on we haven’t looked back!
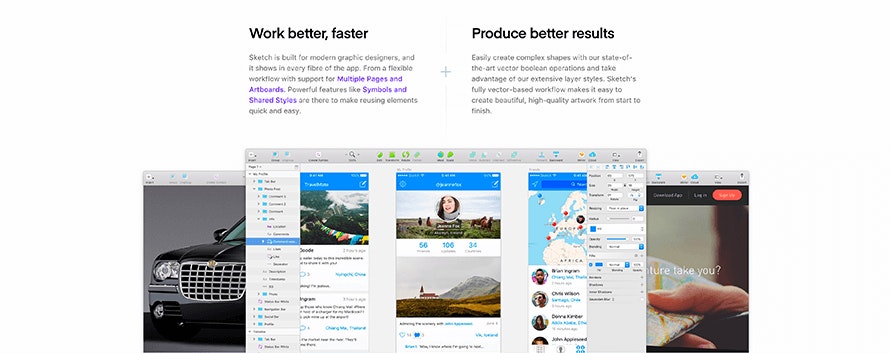 The Sketch site makes some bold claims about the effectiveness of the product.
Unlike PS, Sketch is specifically constructed for web, mobile and UX/UI designers. Until now we’ve all been using a programme that packs in functionality way beyond our day-to-day requirements. Sketch is not trying to replace Photoshop, far from it. You’ll still want PS for all the things it was intended for, the essentials such as image editing and photo-manipulation. Instead, incorporate Sketch into your designer’s toolkit and as streamlined layout device.
THE WORKSPACE
When launching Sketch for the first time the appearance is very clean and minimal. My first thoughts were that it was too clean, it must be seriously restricted on functionality. Either that or soon the canvas would be covered in pop-out pallets and windows.
 The Sketch workspace with one artboard inserted. The UI is extremely pared back compared to its competitors.
As default, the ‘Pages’ and Layers panels sit to the left of the screen, there are a few tools along the top and an ever changing collection of options taking up the far right of the window. I have had no urge to modify this layout and contrary to my first observation the screen has not filled with pop-outs as the right window continually morphs to display the appropriate option.
 Options displayed when a rectangle is selected.
There is a lovely unified approach to the design of this panel and basic effects that are consistently used in web fall easily to hand. Options to position, transform and scale are always stuck to the top of the side bar, and weather selecting shapes or text you’ll see the options to apply blurs and shadows at the bottom. It goes without saying that colours and strokes are easily applied here, adding new swatches is straightforward and keeping track of a projects colours is made easy though the ‘Document Colours’ section.
PAGES & ARTBOARDS
On creating a new document you’ll be first prompted to create a new artboard. The Adaptive right bar now displays an array of artboard sizes based around popular screen resolutions ranging from the generic ‘Desktop’ to the specific ‘Apple Watch 42mm’, it’s blatantly clear that adaptive, device agnostic design is name of the game. On selecting the ‘Desktop HD’ Artboard I quickly built up a series of Artboards using the ‘Insert > Artboard’ workflow. It’s great to have designs side-by-side enabling cross- platform design to become even smoother. Setting views to work on desktop, tablet and mobile enables us designers to think about and produce responsive previews from the off. This puts an end to the tedium of scaling desktop designs later down the line, or choosing the 'mobile first' route which rarely leads to compelling desktop experience. Working simultaneously across artboards leads naturally to a symbiotic approach whereby no particular layout takes precedent, the design is one united system.
 The right column displays just a few of the vast selection of standard artboard options within sketch.
I've always enjoyed the flexibility of working using artboards in Illustrator, and since CC 2015, Photoshop has introduced the feature. Unfortunately, for me at least, the functionality seems clunky - moving, rearranging and resizing artboards tends to turn the air blue, even before I've struggled with the exporting process.
The most basic argument for artboards is to consolidate multiple designs within one file. These maybe different design versions or various device views as previously discussed. To avoid a cluttered working environment in PS, a practice was adopted whereby a fresh file was created for each unique page of a website. To ensure a varied user experience, Bigger Picture's designs are unique for almost every page, therefore this process could quickly lead to huge numbers of individual PS files being created; and invariably did.
Sketch overcomes this problem by introducing the 'Pages' panel. Where a whole new document would be required in Photoshop, sketch’s Pages can be toggled between at a click of a mouse. This is a brilliant feature that had totally eliminated the daily trawl to find each page within finder. The whole site design is now in one place. Sketch has managed to implement this feature in such a way that, so far, lagging hasn't been an issue. This is rather impressive, as in a recent project over 20 pages were in use, each with a minimum of 3 Artboards packed with images and effects.
GRIDS & COLUMNS
Before the first stroke gets drawn, there is often a lot of document setup to do. Across a vast amount of design work, weather print or web, a grid is often required. Out of the box, Photoshop's capacity for guides and grids is rather woeful, you can insert a guide individually but without a third party plugin that's where the flexibility ends. After sometime setting your guides up, you'll be unable to copy them to a new document. Illustrator has the option to copy guides when unlocked, which although not ideal, is an easy workaround.
 Sketch uses a system of columns and rows much like InDesign.
When working in print, InDesign's system of grids and guides is unsurpassed and Sketch has definitely attempted to bring this flexibility of layout into the online realm. With the option to set out a layout grid with 12 columns to fall in line with our boilerplate is great. Then click page rules to add addition guides for container sizes etc. This process of clicking rather than dragging (the universal method in creative suite) has proven to be one of the few relearning sticking points. Once the guide is in play, the positioning pane comes alive and placing a guide to pixel accuracy is a doddle.
TEXT STYLES
Another crossover with layout software such as InDesign or QuarkXPress in the ability to create Text Styles. Typography is one of the most basic but important aspects of any website. A web design will have many different header styles and paragraph styles, which will often be defined early into the design process. Matching styles across pages is easy in code but much easier to miss in the design phase when styles are manually set, but by having the option to set design styles really helps to unite the typography. In Sketch click on your type and set the size, colour, weight and decoration using the right hand pane. Once everything is looking good, choose ‘Create New Text Style’ from the Text Styles drop down. Lastly, the process of naming the new style has allowed me to start thinking of creating CSS classes already. For instance, a new style may be named ‘h1 –orange-header-special’, this may be one step too far in the early stages of design experimentation but further down the line it’s easy to edit names and as all the pages are in one file as amendments are updated globally. Also if that ‘h1 –orange-header-special’ wasn’t special enough, any edits that are made to the style can be updated across every instance, saving potentially hours of manually clicking into individual text layers.
 A range of styles are displayed within Sketches ‘Text Styles’ dropdown.
Using text styles dramatically improves day-to-day workflow but there are many other elements on a page, such as buttons, that often need to have consistent styling. This is where ‘Symbols’ come in.
SYMBOLS
Symbols are a much like a smart object or ‘partial’ in Photoshop. Once, for instance, a button has been designed it may form a repeating part of a page. By selecting the constituent layers, right clicking and choosing ‘Make Symbol’ the layers have now merged and the symbol icon is now visible alongside the layer name. If this is the first symbol to be created, a new page will be generated, aptly titled ‘Symbols’. Here each symbol can be seen on its own artboard, changing the style or content here will automatically propagate the changes across all instances of that symbol. This option is obviously incredibly useful for managing global items such has navigation and footers, but as it’s so easily to implement and modify I’ve started using it for a range of other elements.
 A range of symbols that might be created within a design shown whining the symbols page.
VECTOR VS PIXEL
Historically vector graphics and raster graphics have been kept well apart. Creating static webpages in Photoshop made sense as everyone had monitors that were pixel based, and size variations were limited, especially if the site width was contained. Skip forward to 2017, a world where there are now hundreds of possible resolution configurations, it’s certainly not feasible to design a website to fixed width so adaptive design allows us to maximise every pixel. Vector based Illustrator has been great for icons and, of course, illustrations but doesn’t really work for web layouts. Photoshop is great when you’re working in 72ppi, but view the design on a retina screen and everything is blurred, this has been particularly frustrating since using a 5K display. I can be useful to know that a certain typeface is legible on a traditional 72ppi monitor, but spending a day working in fuzziness for this benefit simply isn’t worth it. It’s always frustrated me that text layers rasterise type is does not behave like an image in browser, also with the rise of use of SVGs, many more graphics aren’t tided to resolution at all.
Sketch navigates this issue in a simple and effective manner. Ostensibly a vector programme, sketch makes it easy to toggle to pixel view. At last I can work I can design in a crisp accurate manor and quickly toggle into pixel view to check designs are pixel perfect. Pair this with (initially rather irritating) zoom snapping, you’ll find yourself designing at a ‘real’ 100% level a lot more readily, which only acts to improve your designs.
 A text layer at a high level of zoom in the default vector mode. Option to ‘Show Pixels’ shown in the top toolbar.
![]() The same text layer shown this time with ‘Pixel View’ selected.
The same text layer shown this time with ‘Pixel View’ selected.
This blend of pixel and vector is seamless, with all objects remaining ‘live’ modifying them is instantaneous thus removing the effort of correctly selecting, activating and confirming changes, and due to the scalable nature of vector there is no need to create smart objects. (although as previously mentioned symbols can be used)
EXPORTING
This is arguably the biggest feature of sketch. The ease of exporting is so intuitive it literally had us designers jumping for joy. We’d never particularly noticed that exporting was a huge pain in the neck, but once offered a new streamlined alternative it had revealed we were living in the dark ages. Here’s a quick summary of my Adobe processes: (the use of ‘my’ is important here as the possibilities are vast so most designers have found their own approach)
ILLUSTRATOR
When exporting SVGs positioning each illustration on its own Artboard is a good start. Resizing the artboard so that the illustration has no margin in either the x or y directions is important as is insuring that the artboard size is in whole pixels. Then I name the artboard with a name that will become a suitable suffix. After this using the ‘Save As’ or ‘Export As’ options under ‘File’ yields similar-ish results, a quick fiddle of the setting and specify to ‘Use Artboards’ and you’re done.
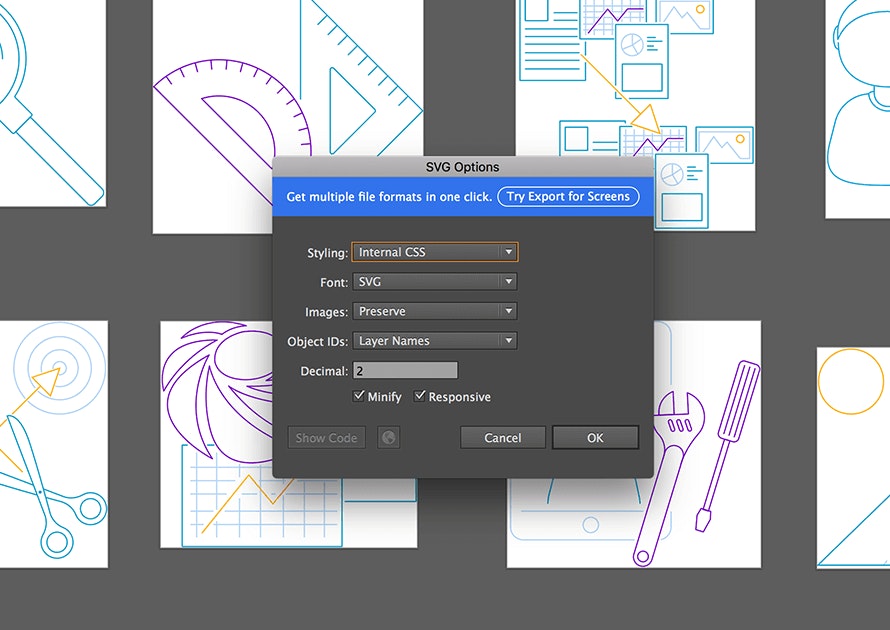 Adjusting Artboards and using Export as Screens to generate SVG image assets within Illustrator.
PHOTOSHOP
As you’ve probably got an entire layout in Photoshop and not just individual elements like in Illustrator so you don’t want to be copying individual canvases or artboards. To extract elements from Photoshop I group all the layers that make up the asset I’d like to export. Next name the group with either a .jpg or .png extension. Now using the Marquee selection, confine the element before adding a layer mask. Repeat this process for all assets, then using ‘Generate > Image Assets’ under the file menu. This will generate a folder alongside your .PSD file containing all the assets. As well as being a clunky process there is no option to export the asset in any different size or resolution other than how it appears in the Photoshop file.
 Using layer masks in Photoshop to generate image assets.
So how does exporting differ in Sketch? Selecting on a layer or group will generate a prompt to ‘make exportable’, selecting this option will engage the export pane in the bottom right of the application window, the name of the group or layer will automatically be picked up. By default, the following options are available: Size, prefix/ suffix and format. It doesn’t take long to realised that this incredibly powerful set of options. In size choose the default 1x option and select a file type such as PNG. Pressing the ‘+’ introduces another row, this time set the size to 2x for retina devices. Pressing plus again, another row, this time choose SVG. Click export, locate a folder, and that’s it! The same asset created in a range of sizes and file types in just a few clicks of the mouse. Furthermore, there are inbuilt options for iOS and Android with all the correct sizes and suffixes automatically entered.
 Exporting within Sketch. A range of raster and vector export options are available for all items.
No longer do I dread getting that message from your front-end developer asking to provide them with that one missing icon, I’m safe in the knowledge that I can have it swooshing across the office within a matter of seconds.
PLUGINS AND COMMUNITY
There’s a huge and ever expanding community behind Sketch and I’m yet to scratch the surface. I’ve installed a couple of plugins; ‘Content Generator’ which automatic fills shapes with stock images which is great for quick page mock-ups. Also ‘Sketch Palettes’ which gives extra functionality to the colour palette. A quick Google search will reveal a range of great plugins that’ll meet any requirement or issue you can imagine.
 sketch.land is a great resource for discovering new plugins.
EXPORTING CSS ATTRIBUTES
This is a minor but awesome option within Sketch. Beyond the actual functionality it represents a desire to bring WYSIWYG design much closer to a browser ready product.
Once our design is down, we’ll quickly get it into browser to see how it behaves. Within sketch simply right clicking on any element allows you to copy CSS attributes for that element. This really simplifies creating the process of creating stylesheets. Simply click, copy and paste into your favourite text editor:
/* Ready to chat?: */
font-family: MrEavesXLModOT-Book;
font-size: 60px;
color: #FFFFFF;
letter-spacing: 0.4px;
line-height: 72px;
The actual text from the design is commented too, fantastic!
STICKING POINTS
There are a few teething issues with Sketch and to add a bit of balance it’s worth noting a few aspects that cause frustration.
MASKS
Images can be masked by shapes extremely easily. But I constantly wrestle with other layers falling into the mask within the fast paced design process. I often find half of my layers are trying to fall within one mask and am forever releasing them and reordering layers.
SELECTING LAYERS
Try selecting a layer that’s obscured by an element above it and prepare for a battle. Holding keyboard keys, selecting using the layer panel, nothing seems to work and haven’t yet found a solution to this problem. Slowly nudging to get eyes on the item is my only current work around.
ROTATING
I wish the option to rotate was just there when the mouse floated outside of the anchor point, instead it has to be engaged with the help of the option key. It’s far from awful but my heavy hands find this selection a bit temperamental.
IN SUMMARY
Sketch is well worth experimenting with; there are tons to great features and time saving tools to make your design workflow silky smooth. Sketch will not replace creative suite, but is a great partner and works alongside it fluidly. With licences available at the one off price of $99 dollars (~£79) it’s incredibly affordable and will most likely earn its money back within the first week. This type of tool has been designers have been asking for and with Adobe’s ‘Experience Design’ in Beta it looks like we’ll be seeing increasing development within this sector over the coming months.
Check out Sketch here: www.sketchapp.com
Check out Adobe Experience Design here: www.adobe.com/uk/products/experience-design.html